Using the Premiere Title Designer
 Premiere's Title Designer is a utility which allows you to create simple text titles for use in Premiere projects.
To open the Title Designer, select

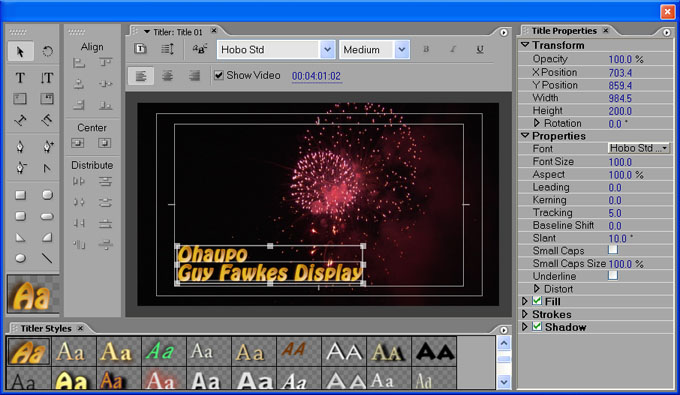
By default, the background of the title composition area shows the current frame in the timeline (i.e. the position of the scrubber). This allows you to see the video underneath the title as you create it. You can also select a different frame for reference if you like.
The title composition area also shows the safe areas - the television safe area (outer rectangle) and the title safe area (inner rectangle). For best results your title should fit inside the title safe area.
To add text, make sure the text tool is selected. Click in the title composition area and enter your text.
To alter the font style and other attributes, use the Object Style menu to the right of the window.
Notes:
- Fairly heavy fonts work best for television and video. Fonts with fine lines are harder to read and tend to flicker.
- You may want to add a stroke (border) and/or drop-shadow to the text. This makes the text easier to read against the background.
When you have finished entering the text, you can select the move tool and reposition the title. You can also right-click the text and select Align for more positioning options.
If you are using Premiere Pro 1.5 or earlier, you will need to save the file (File > Save). Usually you will save the file in the same place as the rest of your project files, but you can save it anywhere you like. Premiere titles are saved with the extension .ptl (version 6.5 and earlier) or .prtl (Premiere Pro).
If you are using Premiere Pro 2.0 or later, the title will be saved as part of the project file.
Once the file has been saved it will appear in the project window as a new item.
Next Page: Importing Titles from Other Programs