Step 5: Publish (upload)
The final stage of construction is the upload. Using a file transfer program, you copy the entire website structure to the appropriate folder on the host server.
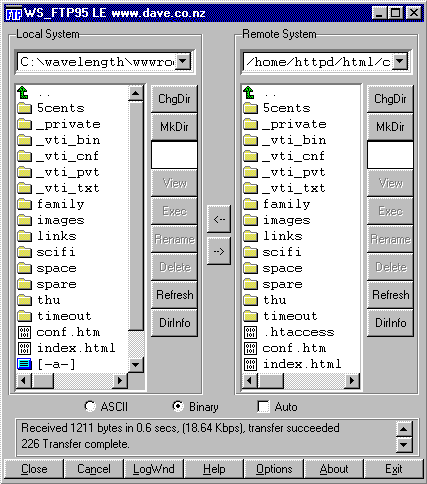
The window below is from the popular program WS_FTP LE, available from www.ipswitch.com.

If you're familiar with file management systems such as MS Windows Explorer, then you won't have any difficulty with this package. The left window displays the site on your local drive, the right window displays the site on your host server. You simply guide the program to the appropriate folders and use the left/right arrows to transfer selected files.
Some site authoring applications have the option to publish directly to the web. This may be largely automated, such as the "Publish" command in Frontpage or the "Synchronise" command in Dreamweaver. These commands can identify files which have been modified since you last published and tell you which ones need to be updated. If you have a large site, this can be a huge time-saver.
That's the end of this tutorial. We hope it's been useful. From here, the best thing you can do is learn more about HTML.