Panoramic Photography
Look straight ahead and place your arms out at shoulder length in front of you. Now, move your arms back until you can just barely see your fingers on each side through your peripheral vision. Without moving your head or eyes, what do you see? Most photography is as limited as the human eye. Point and click a regular camera and you’ll get a limited view. However, panoramic photography can capture this entire field of view and create a stunning, sweeping image that makes a big impact.
What is Panoramic Photography?
Now, move your head slowly from shoulder to shoulder imagining that you’re taking a series of images as you move your head from one shoulder to the next. If you were to lay each of these photos one after another, you’d have a rough, panoramic image. Panoramic photography is more sophisticated than that though it did start out using that basic principle.
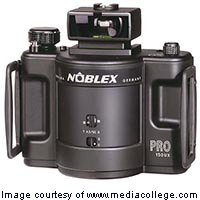
Panoramic images use a wide aspect ratio that provides an unobstructed view of an area, most typically a landscape, covering more than the human eye can naturally see. Early panoramic images covered angles of about 150 degrees. These early images were created using cameras that moved using primitive systems of hand cranks and gears.
 South Beach Alligator Farm, Florida, c. 1910

Today, panoramic cameras are much more sophisticated with motors that continuously rotate the camera evenly in time with moving the film. Digital and film based rotating panoramic cameras now exist capable of producing 360 degree images.
While wide angle lenses can produce wide images, distortion becomes a problem. Take the fisheye lens as a prime example. Fisheye lenses can capture a wide, 180 degree view but with extreme distortion. Panoramic cameras produce images without distortion and with crisp detail throughout.
Technology has progressed to the point where it’s possible to take a series of regular images and “stitch” them together into a panoramic image. These images are often referred to as segmented panoramic images. In the pre-digital age, photographers made crude attempts in the darkroom to patch images together but results were not impressive. Today, with software, photographers can take a series of digital images and stitch them into an impressive panoramic photograph that is free of parallax errors and visible seams. Techniques vary but one common necessity is that the camera must rotate around the “entrance pupil” which is a virtual point in the lens defining the entrance that can accept light. Otherwise, distortion will be evident.
How to Find the Entrance Pupil
This requires two vertical objects: one close, one far. When viewing the images while panning the camera, the gap between the two objects should remain constant. If the gap increases while you pan away from the near object, the rotation axis is forward of the entrance pupil (or nodal point). If the gap decreases, the rotation axis is behind the entrance pupil. Adjust the position of the camera until the gap stays constant as you pan the camera.
Whether you own a true panoramic camera or want to experiment with panoramic stitching software, adding panoramic photography skills to your toolbox gives you a wider view of the world and more creative options.
Examples of Panorama Photos
 360° panorama of the Te Awamutu Rose Gardens (New Zealand).
The left edge of the photo matches with the right edge, creating a (nearly) prefect transition when seen in a panoramic viewer.
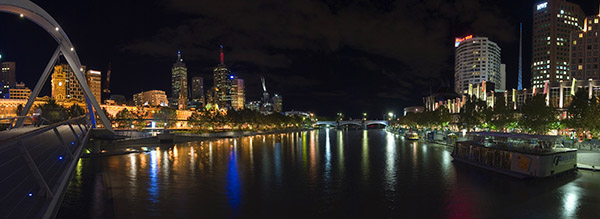
 Yarra River at night (Melbourne, Australia). Photo by David Iliff.