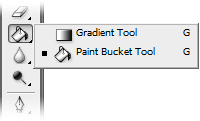
Photoshop Paint Bucket Tool
The paint bucket tool fills an area of an image based on color similarity. Click anywhere in the image and the paint bucket will fill an area around the pixel you clicked.
The exact area filled is determined by how similar each adjoining pixel is to the pixel you clicked on. You can adjust this setting in the options toolbar by changing the tolerance value (make sure the paint bucket tool is selected first). A low tolerance means only very similar colors will be affected, a high tolerance means more pixels will be affected. The range is 0 (exact color matches only) to 255 (all colors).
The example below shows how a simple gradient is filled with green when the center of the image is clicked. The first fill uses a tolerance of 16, the second uses a tolerance of 64:

Other settings in the options bar include:
- Fill: Foreground color (i.e. the currently selected color) or Pattern. If you select pattern, the next drop-menu becomes active and you can choose a pattern to use.
- Mode: The same "blending modes" found in many other tools, including normal, dissolve, lighten, darken, etc.
- Opacity: Set lower to make the underlying image partially visible.
- Anti-alias: Make smoother edges by blending gradually with adjoining pixels.
- Contiguous: (see below).
- All layers: When using multiple layers, all layers are used to create the fill (otherwise only the selected layer is used).
Contiguous Fill
When the contiguous checkbox is selected, only pixels that are connected to the original pixel are filled. The example below shows how this works. The image is clicked near the left hand side—first with contiguous on and then with it off:

Further Notes:
- You can prevent transparent areas being filled by locking the layer’s transparency Layers palette.
- The paint bucket tool cannot be used with images in bitmap mode.