Inserting Pictures in Microsoft Word
Adding pictures to a document can improve its readability as well as clarify points that are being made. Pictures usually come from two sources – a picture you have taken or created that is saved on your computer or what is called clipart.
Steps for adding your picture
Put the cursor at the location you want the picture to be located in your document. Click on Insert, then Picture, then From File. The insert picture dialog box will appear and you can then navigate to where you have previously stored the picture, highlight it and click the Insert button.
Steps for adding clipart
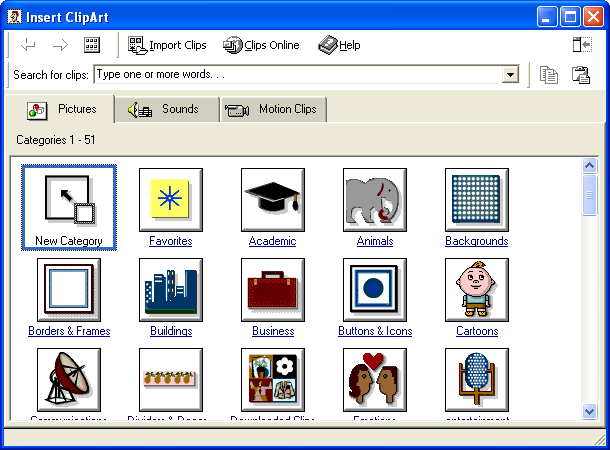
Put the cursor at the location you want the picture to be located in your document. Click on Insert, then Picture, then Clip Art. The following dialog box will appear.

You can pick pictures from any of the categories you see in this window or you can click on Clips Online and go to Microsoft’s website to search for clip art.

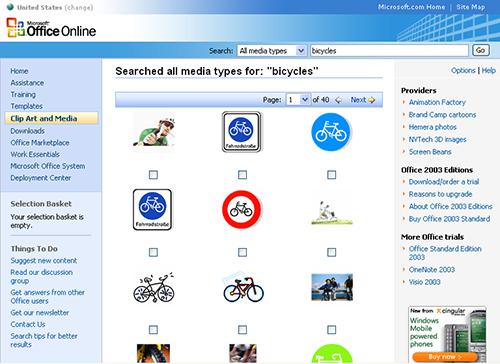
Type the name of the type of picture you want and click the Go button. For example, type "bicycles" and a display similar to the following will be displayed.

In this example there are 40 pages of different clip art pictures of bicycles to choose from. Select the picture you want by clicking in the check box under the picture.
You will see the download 1 item will appear on the left of the screen.
Click on the Download 1 item link and then click Agree on the next screen. Continue on the following screen and then Download Now on the screen after that. Click on Open on the download screen and you will see the picture you have selected similar to the sample below.

Click on the picture then the download arrow and the picture will be put in your document. Now close this screen and the Microsoft web page to return to your document. The picture will be active and the Picture tool bar should be showing. If it is not click on View on the Menu bar then Tool Bars then Picture.

Next page: Formatting a letter