Using Green Screen Footage
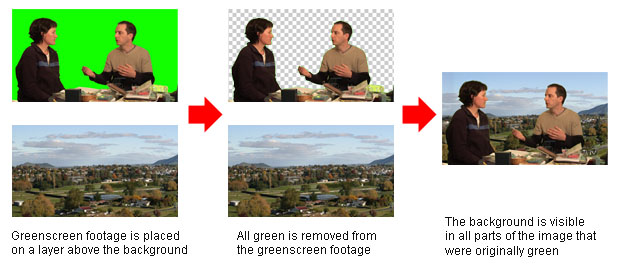
Once you have recorded your green screen footage you will obviously need to remove the green parts of the image and replace it with your own background. This is done through a process called chroma keying, which means selecting a colour and removing every instance of that colour in the image. Any image placed "behind" this image then becomes visible.

There are two common ways to create a chroma key:
- In real time, using a video switcher or special effects generator.
- In post-production, using editing or compositing software.

We will assume that you are using the second method since this is by far the most common, especially for beginners. Exactly how you do a chroma key will depend on the editing software you use but the general process used by most applications goes like this:
- Place the green screen footage on a layer in the timeline.
- Place the footage or image to be used as the background on a layer below the green screen footage.
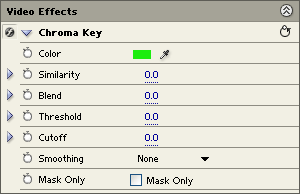
- Add a green screen or chroma key effect to the top layer (the example shown is the effect supplied with Adobe Premiere).
- Select green as the colour to use in the key. Most software provides a colour picker to help you do this.
- After selecting the colour, parts of the image will become transparent and you should see the background appear in these parts. Adjust various parameters to get the best effect.
Next Page: Tips