Transitions and Handles
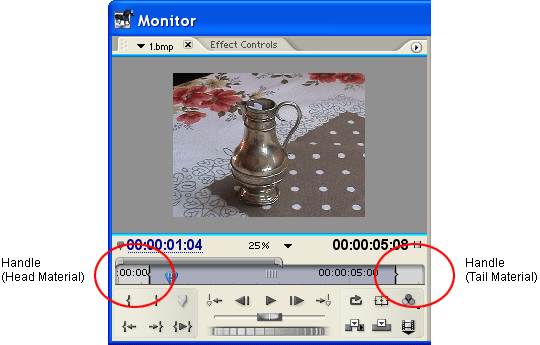
When creating transitions in Premiere, it's very important to understand the role of handles. Handles are extra footage before the clip's in-point and after the clip's out-point. If you view a clip in the Preview monitor as illustrated below, the handles are the areas in the timeline outside the darker grey. Handles are also known as head material and tail material.

Obviously handles only exist if you have captured more footage than you are using in the timeline. If you are using the entire duration of the captured clip, then there are no handles.
Assuming the clip does have handles, the handles are used to create the extra footage needed for the transition.
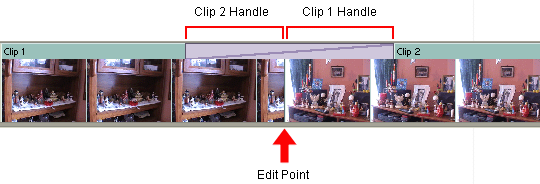
The timeline below shows two clips with a video transition. Because footage from both clips is needed throughout the transition, Premiere uses the tail material from Clip 1 and the head material from Clip 2 as handles.

If a clip does not have handles there are various options:
- If one of the clips has handles, Premiere will automatically align the transition on the other clip rather than the edit point.
- If neither of the clips have handles, Premiere will repeat the last/first frame of the clips to make the transition.
- Try dragging the transition left and right in the timeline to get the best compromise between available footage and repeated frames.
When a transition is used with repeated frames, diagonal warning strips are shown as illustrated below. In this case Clip 3 lacks a handle, so the first frame of Clip 3 is repeated for the first half of the transition:

Tip: The split-screen view is very useful when dealing with limited handles (see next page).
Next Page: Transition Settings