Export Windows Media Files in Adobe Premiere
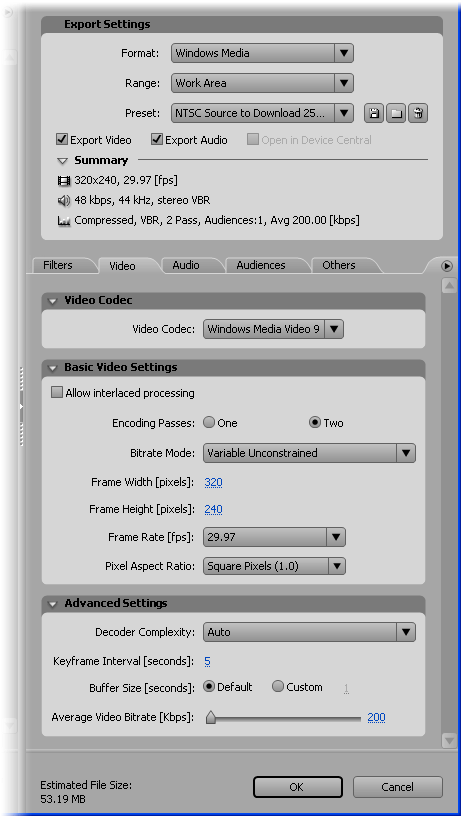
Place your video clip in the Premiere timeline. From the File menu, select File > Export > Adobe Media Encoder. The Export Settings window will appear. From the Format drop-menu select Windows Media. The options in the rest of the window change to reflect this format.

From the Preset drop-menu select the preset which best matches your delivery platform. The example above shows the NTSC Source to Download 256kbps setting, suitable for web browsers on a reasonably fast connection.
To customize a preset or create your own, simply make a change to any of the options, then click the Save icon to the right of the Preset menu.
Metadata
To add metadata (information such as title, copyright, etc), click the flyout menu button to the right of the Others tab, then select XMP Info.
Saving
When you're happy with the settings click OK. You will be prompted for a file name and location for the encoded file. Windows Media files use a variety of extensions, the most common being .wmv.
Next Page: Exporting RealMedia