Keyframes in the Effect Controls Window
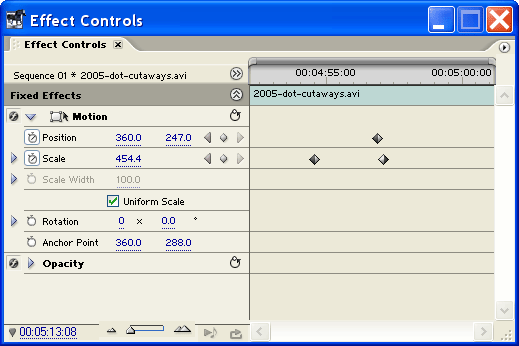
The preferred way to create and edit keyframes in Adobe Premiere is to use the Effect Controls window. To begin, open the Effects Control window (Window > Effect Controls) and select the appropriate clip in the Timeline.

The right-hand side of the window is a miniature timeline which shows he selected clip, with keyframes indicated by diamond icons. This view allows you to see and edit keyframes for all effects at once.
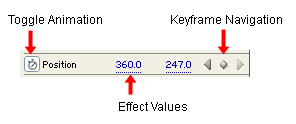
The left side of the window shows all effects which have been applied to the selected clip. Each effect includes the following:

- Toggle Animation: When selected, animation is enabled and keyframes can be created. When deselected, any existing keyframes will be deleted.
- Effect Values: The values for the effect.
- Keyframe Navigation: The left and right arrows move the Current Time Indicator (CTI) to previous/next keyframes. The middle button creates a new keyframe at the CTI. If the CTI is positioned on a keyframe already, this button deletes it.