AutoCompose Score: Import Files
 In the Tasks/AutoCompose panel, click the Browse Scores button. This opens Adobe Bridge and displays the contents of the Soundbooth Scores Folder (this can be defined in your preferences if you wish, but it should show the standard scores by default).
In Bridge you will see a selection of folders named Atmospheric, Country, Easy Listening, etc. Double-click the folder you wish to browse, then look for files with the .sbst extension (Soundbooth Score Template). You will also notice the asset folders — these contain individual wav files that make up the scores. For now, just double-click one of the .sbst files to open it in Soundbooth.
Note: You can preview scores in Bridge by single-clicking the files.
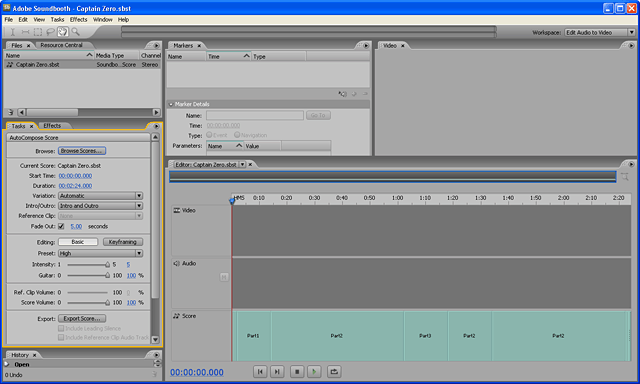
Once the score has been imported, it appears in the Editor panel and more options become available in the AutoCompose panel.

Referencing to a Video Clip
Assuming you want to match the score to a video clip, import the video clip now (File > Open or double-click in the Files panel).
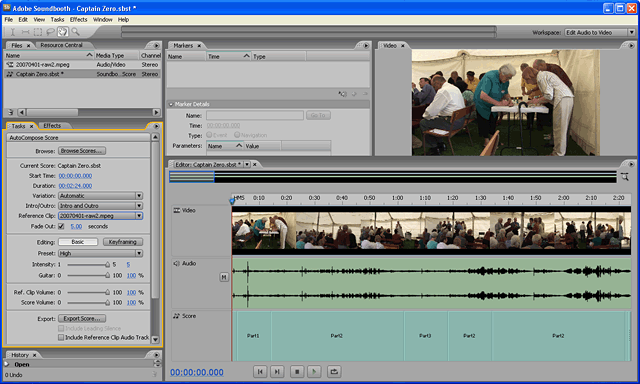
 In the Files panel, double-click the score template to bring it into focus. In the Tasks/AutoCompose panel, click the Reference Clip button and select the name of the video file. This links the video to the score and places the video (along with its own audio) in the timeline above the score.

Next you will need to alter the duration of the score to fit the video. Do this by dragging the handle at the right end of the score in the timeline. In the example above, the video is much longer than the score so we would need to zoom out, then drag the score handle to the right until it is long enough.
Note: Adjusting the score's duration does not alter the speed or pitch, it replicates or removes parts of the score.
Press the play button below the timeline to preview the video with the score.
Next page: Customise the Score